Lower Hand Single Intervals


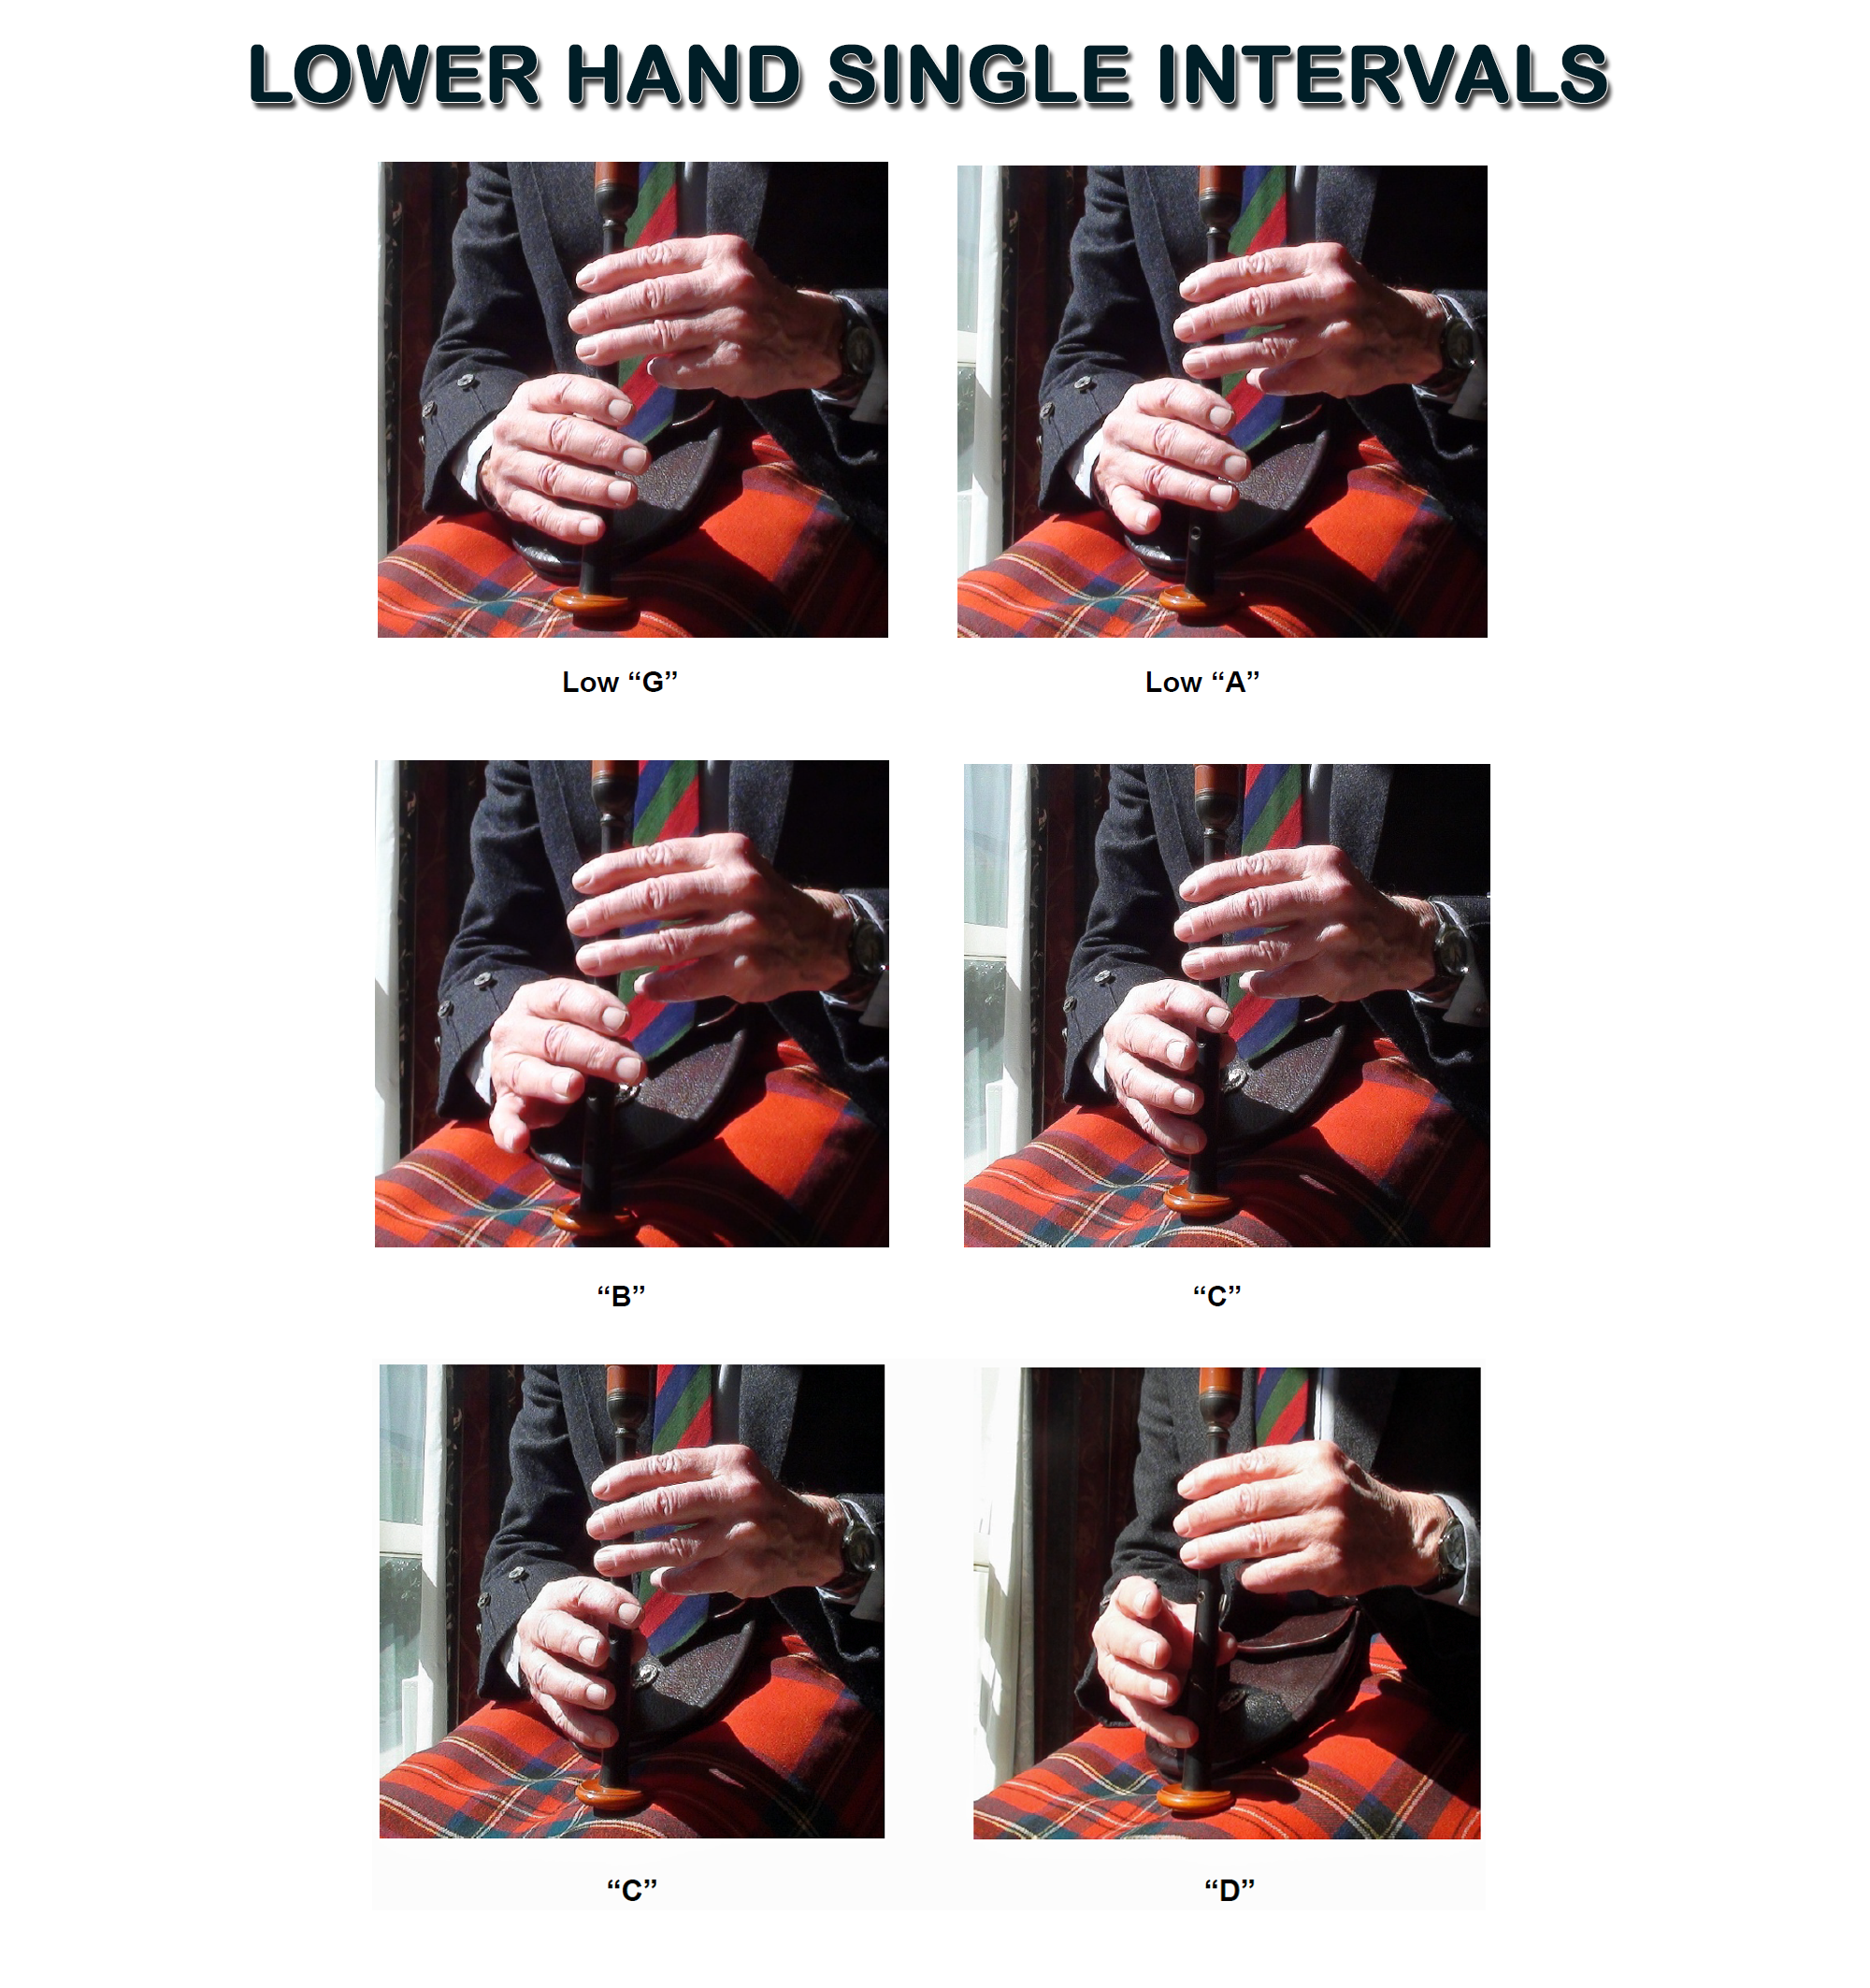
Low “G” to low “A”
Refer mainly video above for all lower hand. Place the lower hand little finger on the bottom hole to start on low “G”. Hold for about 2 or 3 seconds then lift the little finger smartly (no lazy fingering) above the hole for the low “A” held for 2 to 3 seconds. Replace the finger smartly to low “G”. After a few repeats without blowing, recommence, with constant steady blowing, repeating the exercise many times correctly and listening all the time for the two clean sounds each in even/equal duration as you should apply to all the other interval exercises.
Low “A” to “B”
Sound low “A” for those few seconds then lift smartly the next third finger to sound the “B” and hold it equally for those few seconds. Repeat much as before many times to gain
proficiency.
“B” to “C”
From “B” lift the next second finger, then replace the little finger almost at the same time to sound “C”. Return to the “B” after a few seconds by lifting the little finger and replacing the second finger. Repeat often enough correctly. Hint – when an interval has more than one finger in the movement such as this one, think initially of the lifting motion first with the replacement action a fraction later until able to accomplish cleanly together at the same time. Early replacement causes unwanted crossing sounds.
"C" to "D"
Fast track forward to 2.55 minutes.
Simply play “D” from “C” by lifting the forefinger smartly while keeping the little finger on its hole. Return to “C” and repeat steadily with equal time on each note of 2 or 3 seconds. Reminder – The right hand thumb should still be in its correct position behind the second finger.
Low “G”, “A”, “B”, “C”, “D” sequence:
Return to low “A”. Sound low “G” to commence this sequence of each note from low “G” through to “D” steadily with each note of equal duration. Concentrate and remember – Each note should sound clean and clear without any hint of crossing sounds. Any weak or uncertainty intervals should be analysed, corrected and practised more often correctly. Attempt the reverse sequence – “D”, “C”, “B”, “A”, low “G”. This completes the lower hand single intervals exercises.
Attempt the reverse sequence – “D”, “C”, “B”, “A”, low “G”.
